Hooking up an 80s computer with batteries and scrap wires
I originally wrote this post in Swedish for Stacken Computer Club with the title No, I don’t want to wait until we have the right cables. This is why there’s a bunch of names it seems like you’re expected to know. I still felt it was interesting enough to translate and repost.
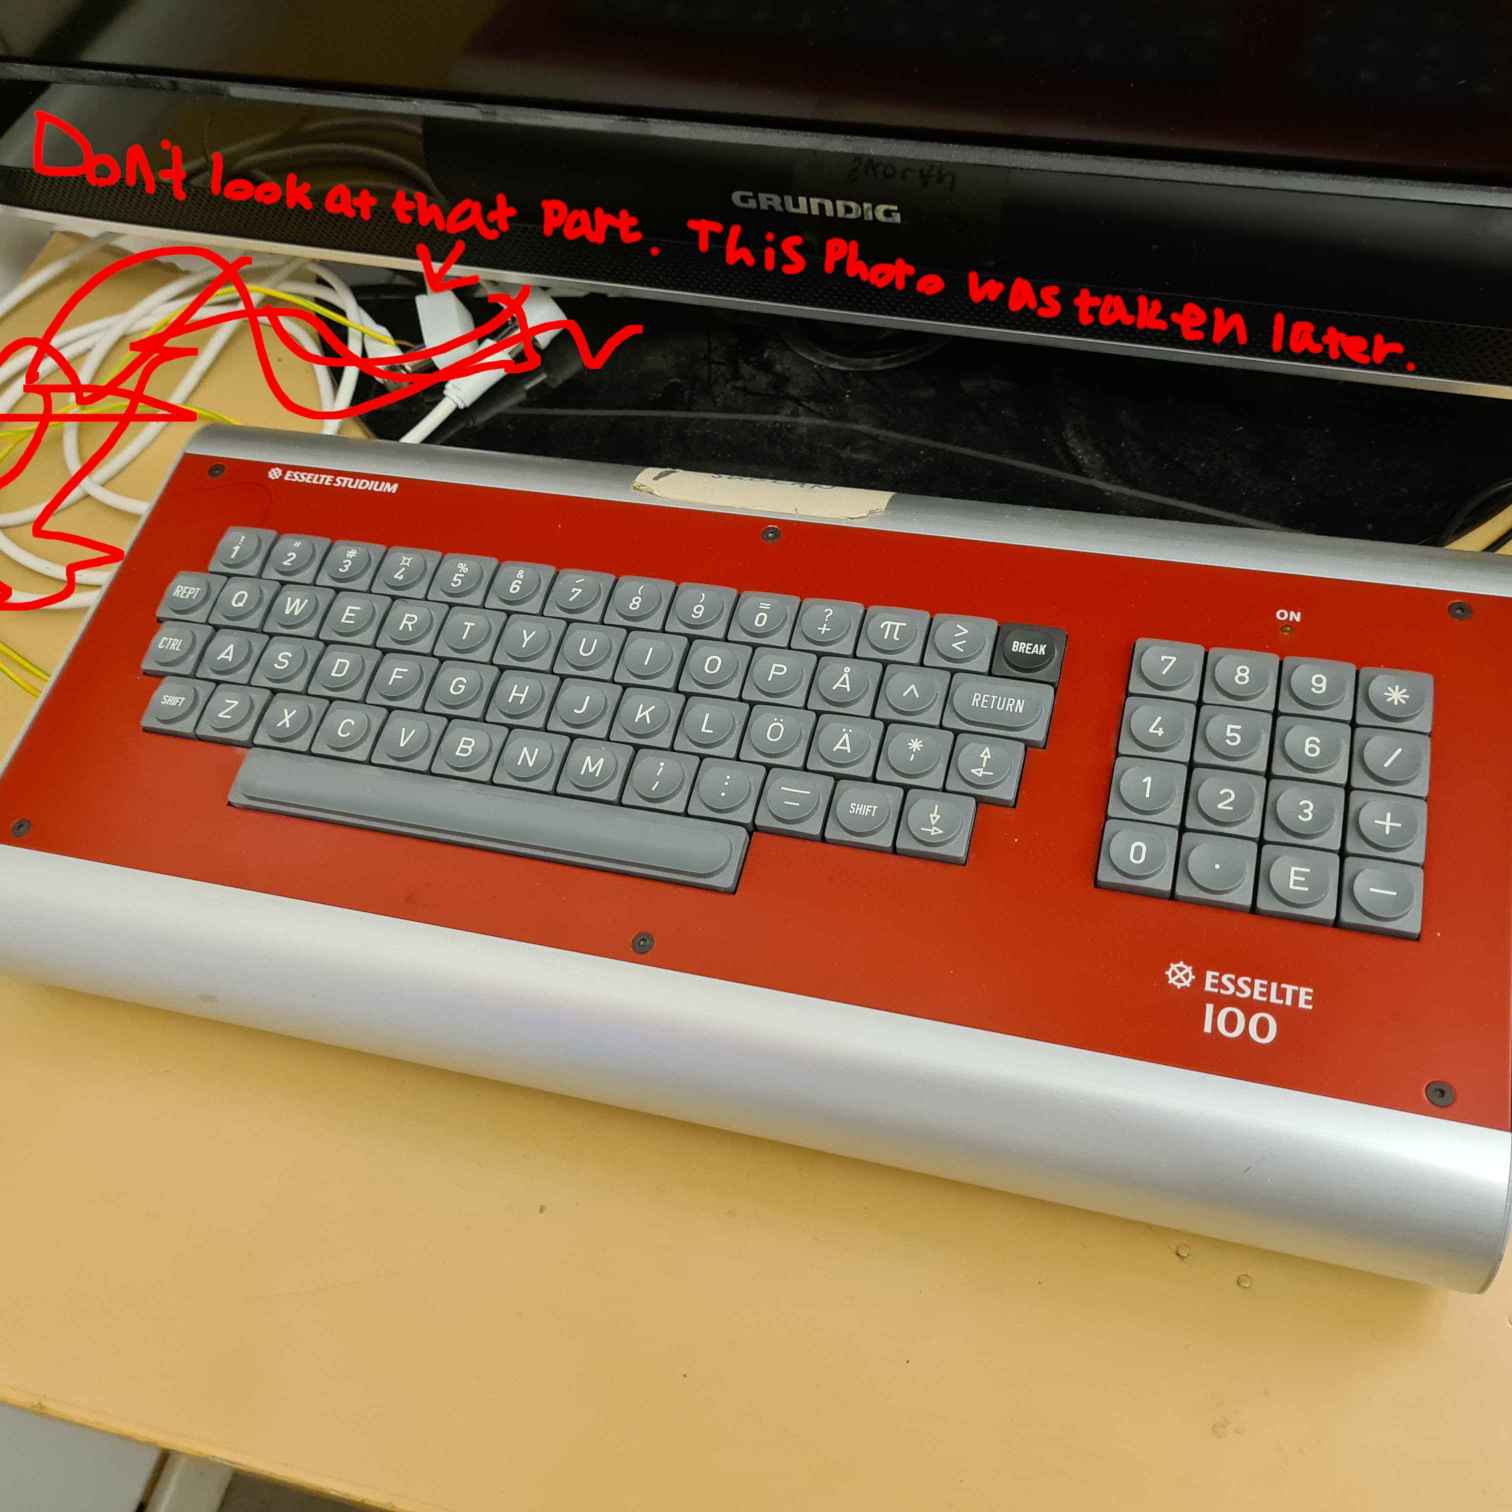
One Thursday evening, I and a few others were talking about a few of the computers that sit in the display case in Stacken’s club room, one of those machines being the Swedish computer Esselte 100 from circa 1980. Cables were missing, but that wasn’t a problem.
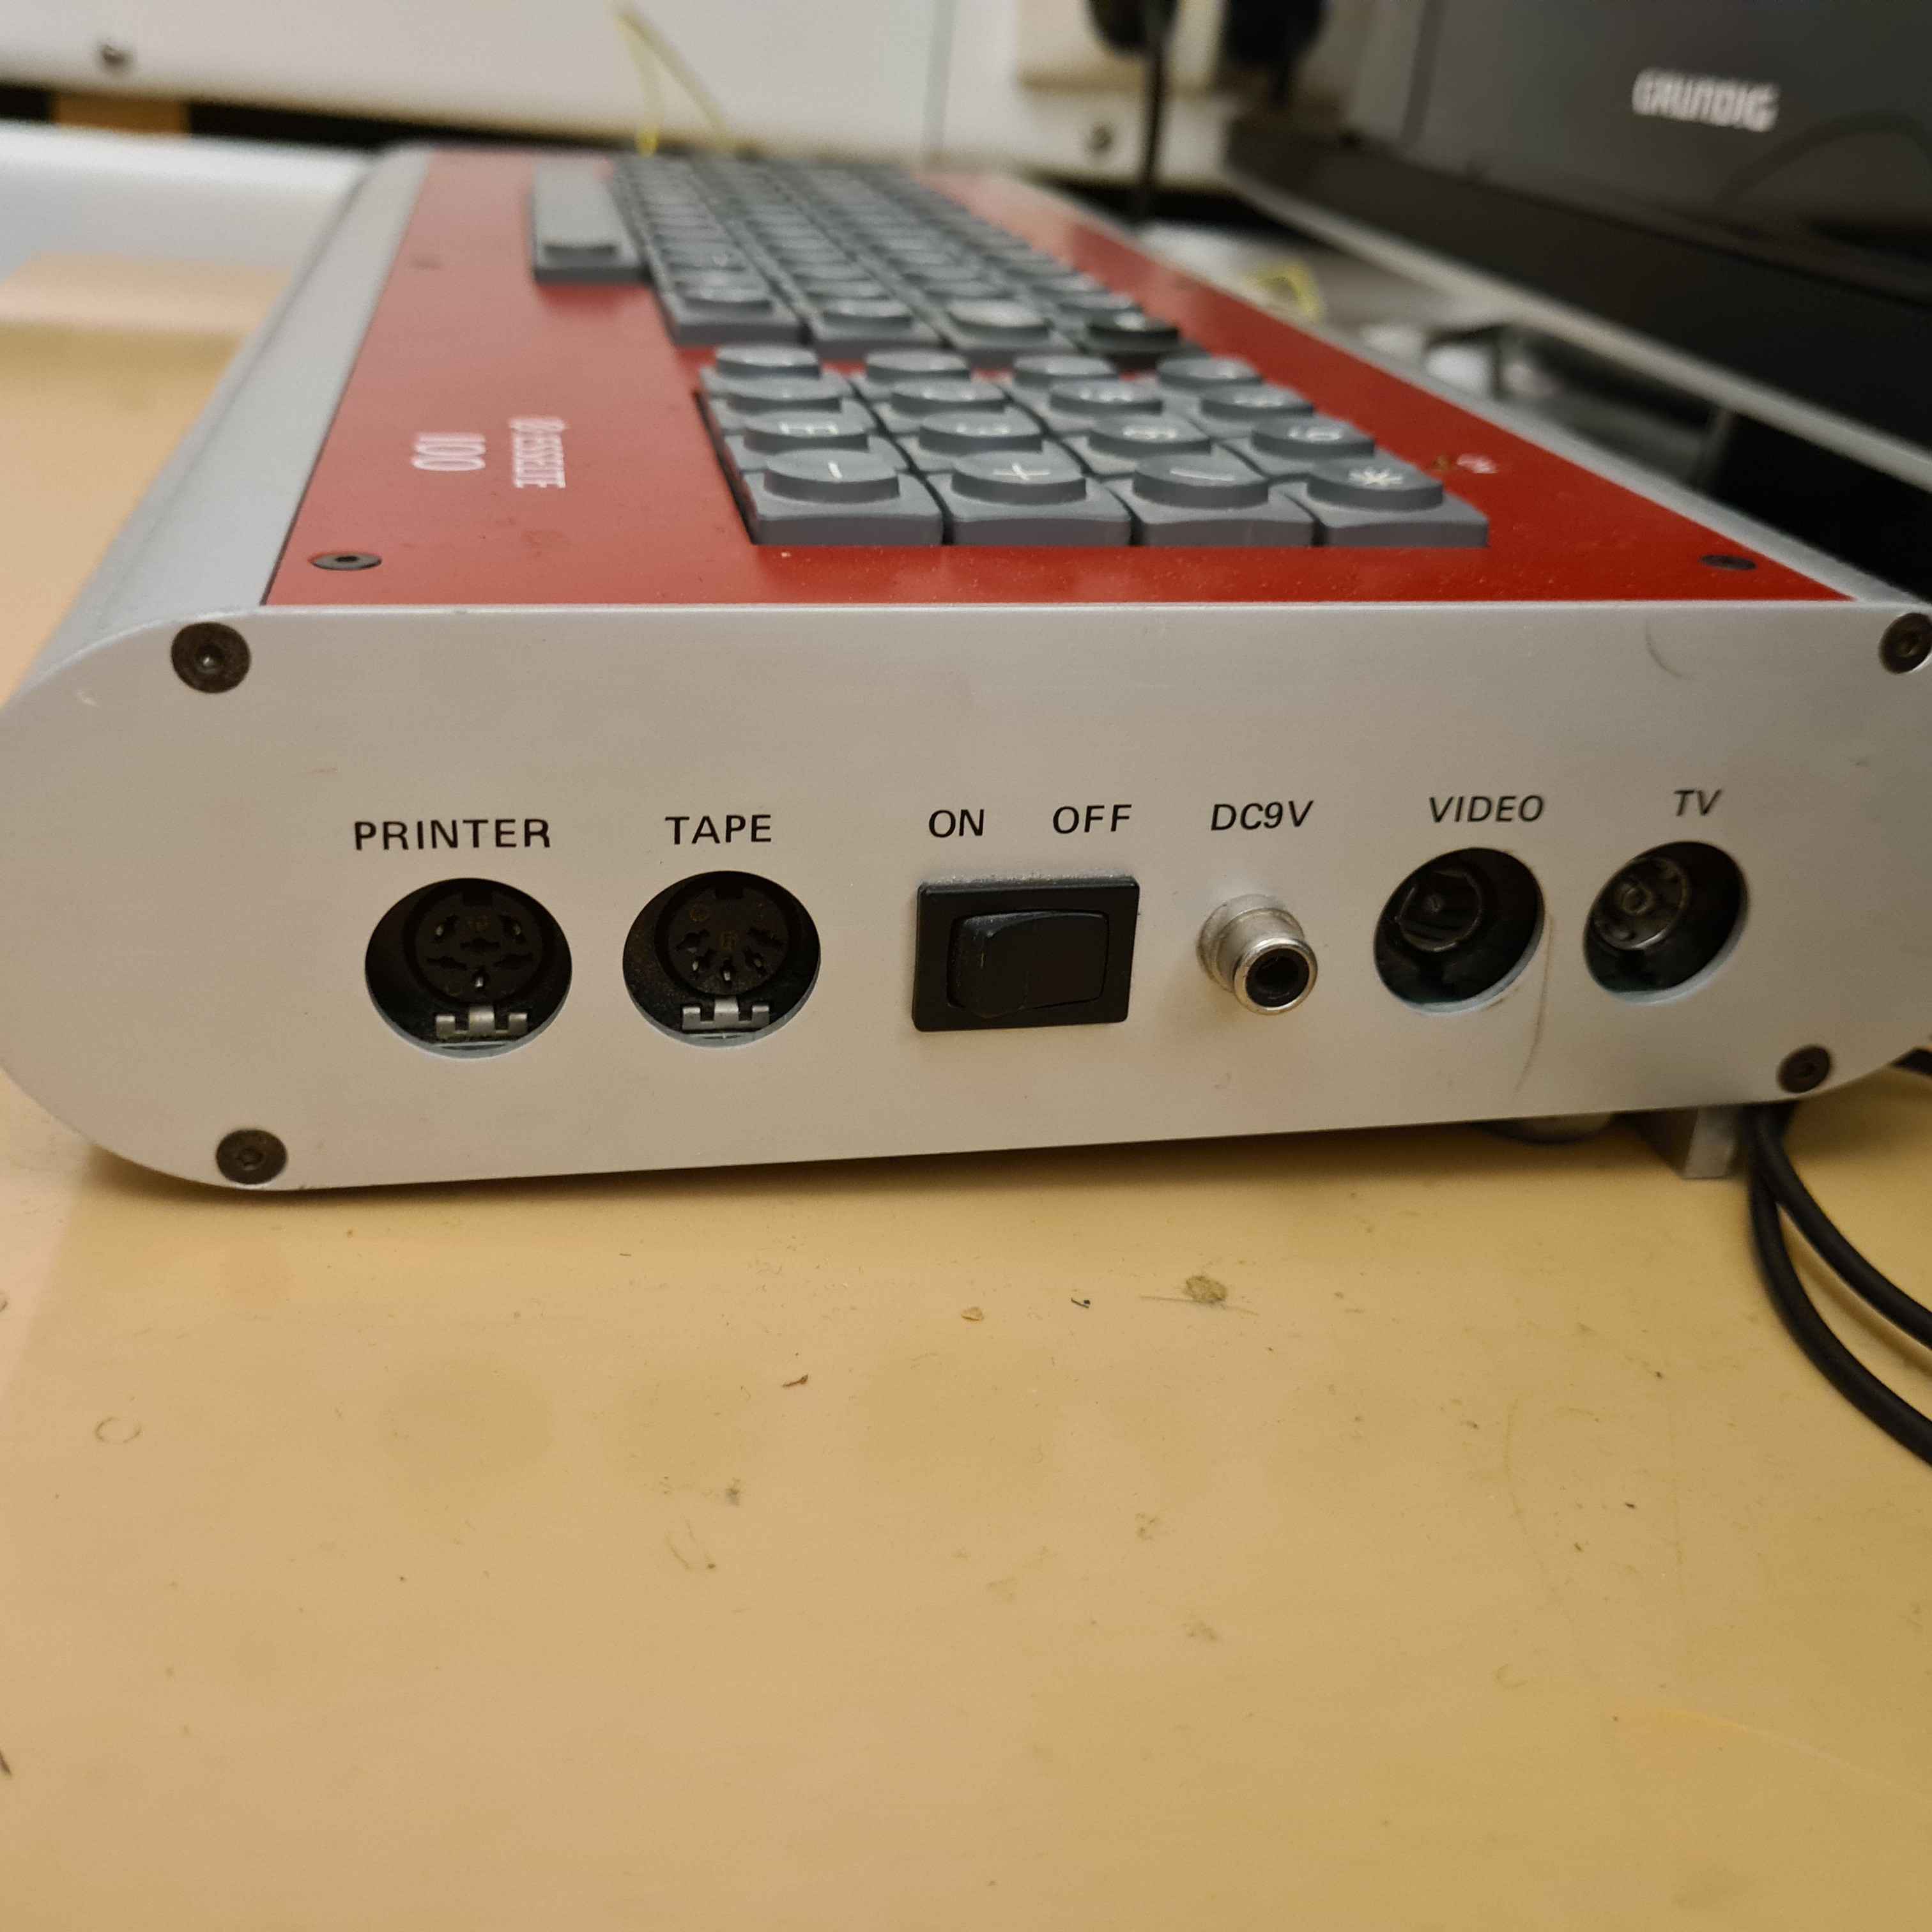
With a case built like a tank (or at least like a Volvo 740) and a keyboard that feels like tired yogurt in a rusty bowl, the Esselte 100 isn’t the most ergonomic computer to use. It doesn’t win the I/O competition either, with two proprietary ports for a printer and a cassette tape player, and no expansion port. Naturally I wanted to get it working.
Power
The first problem was that we couldn’t find any 9 volt power supply. The second problem was that we didn’t know if the connector was center positive or center negative. We have something of a shortage of electronics equipment so there wasn’t much we could do about the first problem. We could solve the second problem by opening up the computer. I unscrewed one side of the case and discovered that the cables were politely color coded and that it was center positive. Now we just needed to get power into it.
We didn’t have a 9 volt power supply, so I started digging in the battery box. There were no 9 volt batteries there, but there were a few AA batteries. Good enough! With 6 of them in hand I was ready to get started.
Step 1 was to attach a wire to ground. I fished out an appropriately earthy looking cable (green and yellow) from a toolbox and started trying to attach it to the ring on the RCA jack that the power will come in through. After circa 15 minutes of trying I had to give up. That ring was not meant to have a wire crammed under it. I decided that someone would have to hold the wire there by hand.
Then we needed another cable for the +9v. That was a little harder since there wasn’t any large practical point to use. I also couldn’t find a good cable so I took two multimeter probes and stuck them together for a cable with two pointy ends. Someone has to hold that there by hand too.
Then we had to connect the batteries in series and there’s several possibilities here. You could, for example:
- put them down side by side with alternating directions and tape aluminium foil on the ends
- use a real battery holder
- balance all 6 batteries upwards and bet the house that they won’t fall (a marginally better idea than believing that horses exist), or
- put the batteries in some kind of groove
The last solution seemed easiest, so Rasmus and I started to look for something that could fit.
Almost immediately Rasmus found a shelf bracket. Perfect. The batteries are too large to actually go down into the groove, but that wasn’t necessary. It gives a good slope that can keep the batteries together using gravity, but the batteries don’t slide off, and that’s all I can ever ask a shelf bracket to do. To make it stand up without falling over I jammed one end under a computer monitor.
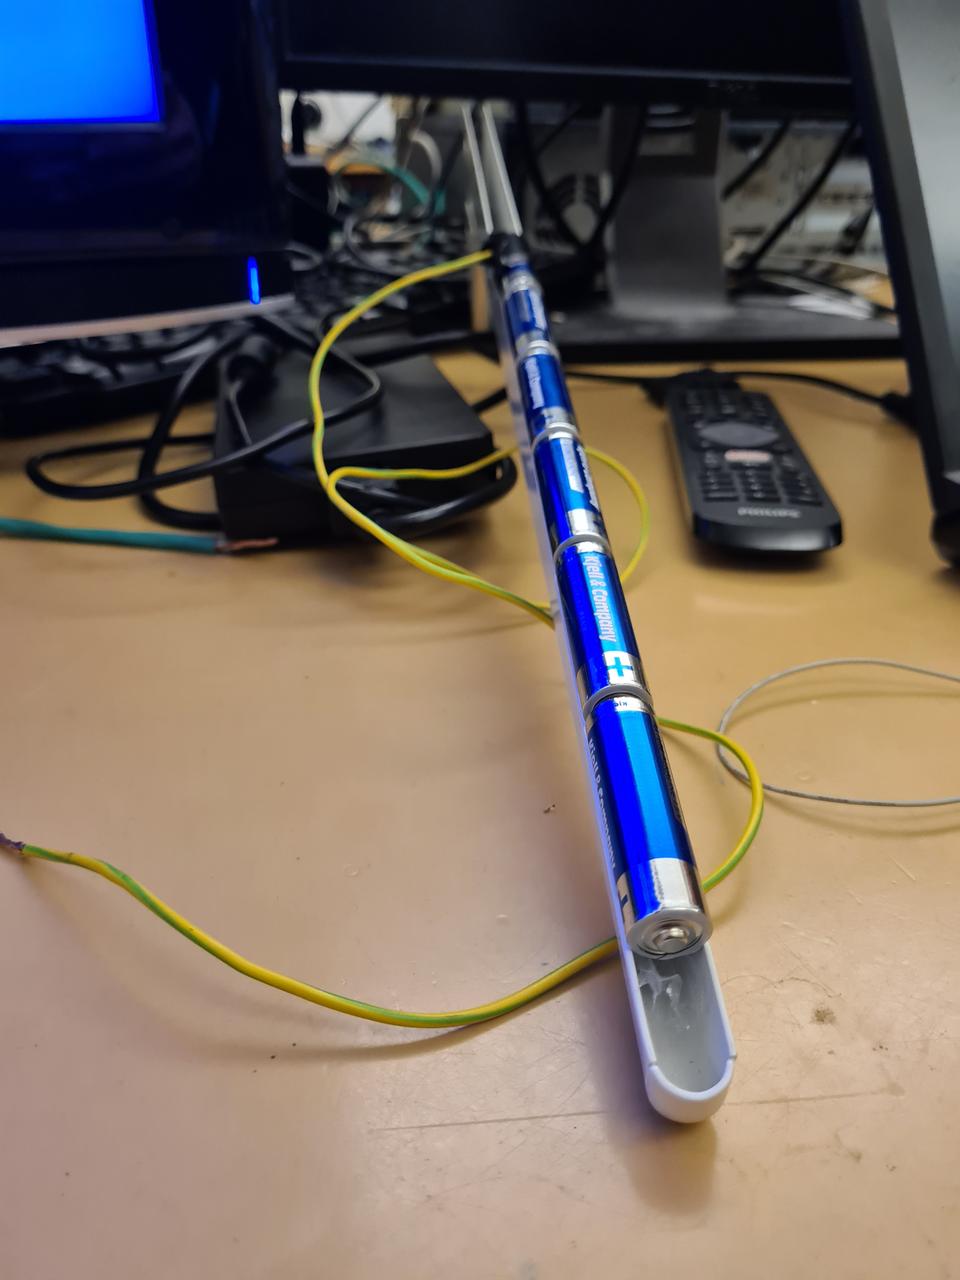
There’s a little power LED on the computer and I decided that all I needed was to see it light up, then I would be happy. We put the batteries into the “magazine” and taped the ground wire to the negative side of the battery furthest in the back. Rasmus held the wires for the plus side, I held the ground wire in place, and the computer came to life. Everyone was satisfied.
Video
I wasn’t satisfied. Now that we knew the computer received power it felt necessary to see it generate a picture too. I can’t exactly explain why it felt necessary, but it was, in the same way that it’s necessary to say “hö hö” when you see the chess paint on Christmas Eve.
We had a TV ready to go, but we couldn’t find a coaxial cable. We needed an alternative. Just then, Harald threw a Cat 5 cable onto the floor that he said was broken. The plastic flaps that keep the plug in its socket were snapped on both sides. I threw myself at the cable almost immediately, then snatched the nearest pair of scissors.
A little cable violence and wire twisting later I had my coaxial cable. It had gone from twisted pair to twisted octet (all wires twisted together). Then we just had to cram my beautiful coaxial cable into the antenna jacks on both the TV and the computer.
And lastly there’s this whole “ground” thing that’s so important. Normally the TV and computer share ground via the outer ring of the coaxial cable, but in this case there is no ring on the cable, so an extra ground connection is needed. I looked around the room but nothing seemed appropriate. The port on the TV is on the back left (from the front) and the port on the computer is on its right side.
After a while Harald came up with the solution: steel wire. A long piece of steel wire was placed around the outer ring of the TV’s antenna jack and was led around the side to some fitting point on the computer where it could be violently crammed in.
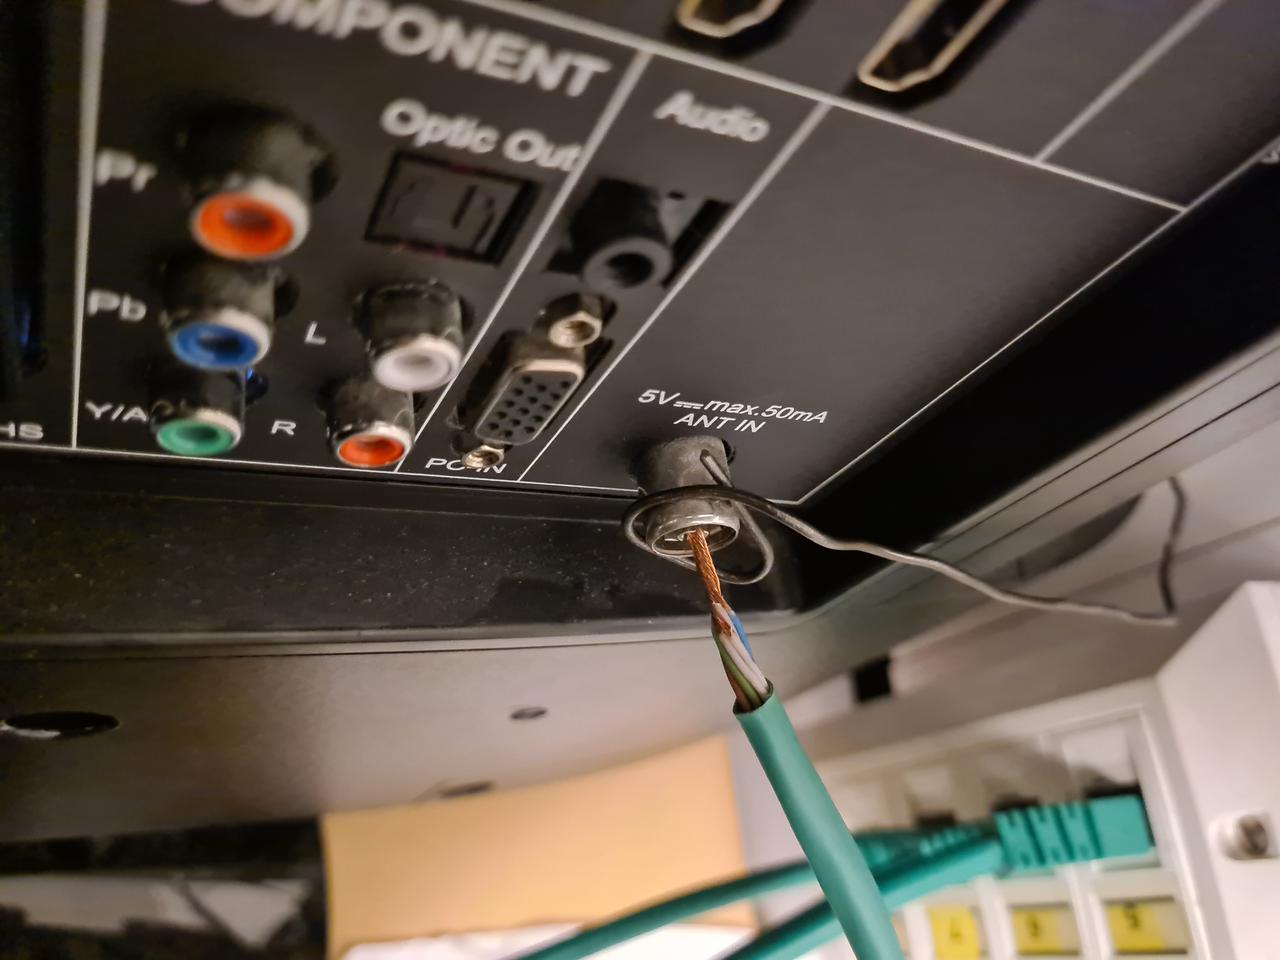
After the connection was tested with a multimeter we turned on the TV. There’s no guarantee that a computer this old will send its video signal on a particularly normal frequency so a channel search was necessary. Like before, Rasmus and I applied power while Harald started the channel search.
After a while the TV found a channel and we removed power. You can’t trust any half-modern TV to do the right thing under any circumstances so we waited a few minutes for the entire channel search to finish. Once it was done we selected the new channel and applied power again.
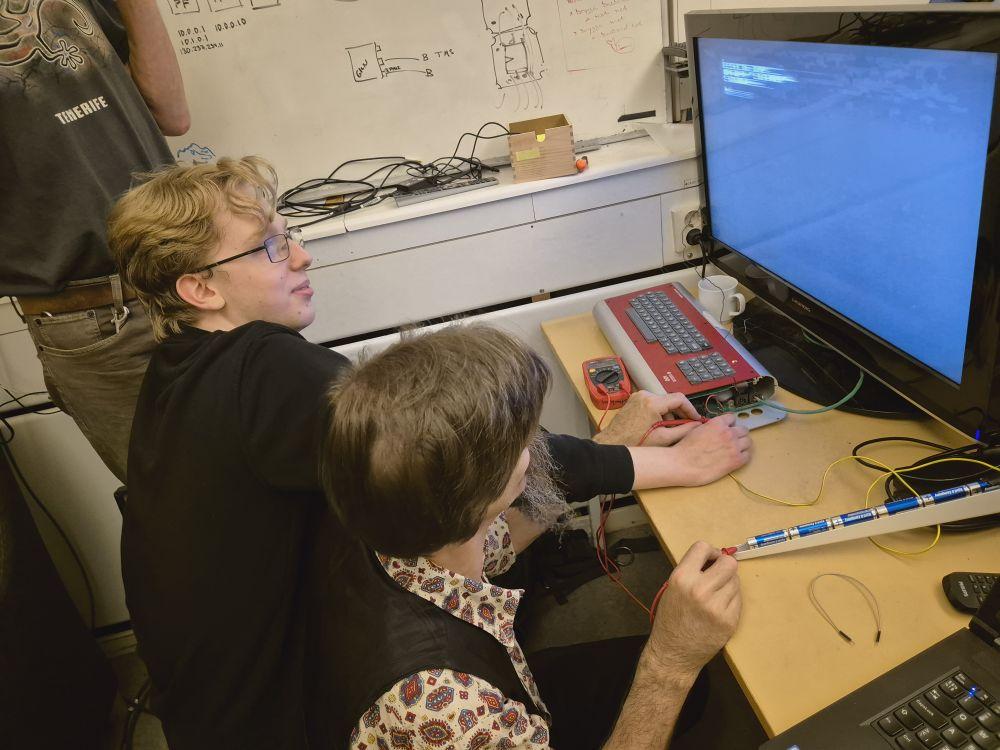
An image! Somewhat blurry, but almost readable if you already know
what it says. Marcus typed in the classic example program
10 PRINT "HELLO" \n 20 GOTO 10 and it worked just fine.
Something seemed odd about the text, but with this image quality it
hardly matters. The computer works and that’s the important part.